
Step‑by‑step printing guide
1. Access your templates from the links provided
2. Click the purple button: “View template”
👉 Note: You’ll need a free Canva account to edit. If you don’t have one, it’s quick and easy to sign up!
3. Customize your content
Update names, date, and any other text.
Feel free to adjust the colors or fonts to make it your own, just note that the illustrations are not editable.
4. Download your customized design & Print
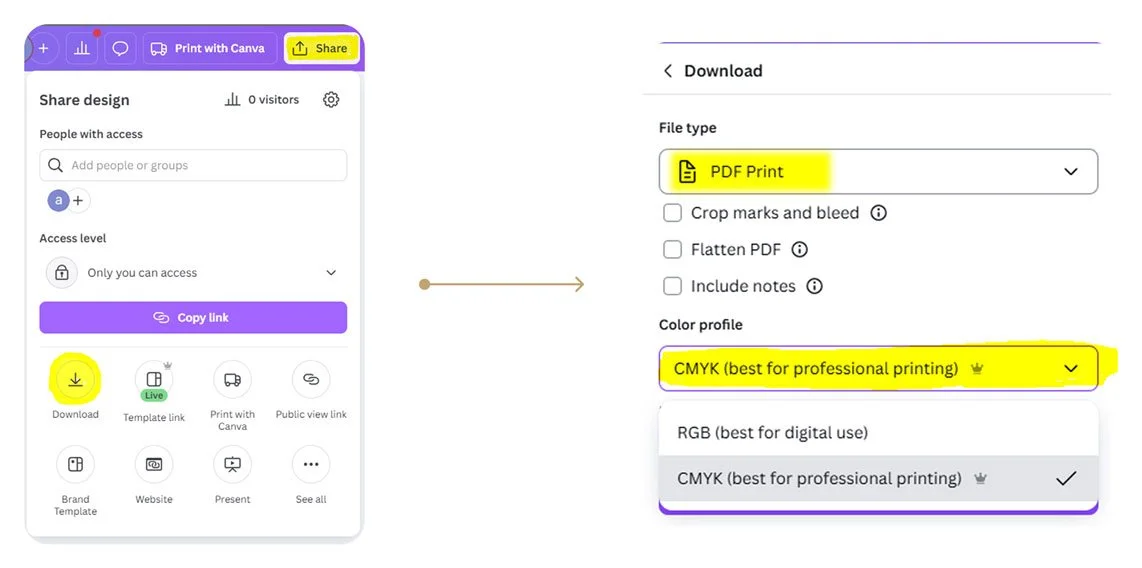
Click the Share button at the top right.
Select Download.
Choose PDF Print (Best for printing)
→ Pro Tip: If you have Canva Pro, switch the color profile to CMYK for the most accurate print colors.
→ If you’re on the free version, use RGB.→You can also choose to print directly from Canva if you wish. (Usually it is pricier than other options)
Home Printing Tips
Open the File in a PDF Reader for Best Results
Recommended: Free Adobe Acrobat Reader (Windows & Mac)
If you don’t have it, you can download it here: get.adobe.com/reader
2. Printer Settings
In Adobe Acrobat Reader:
Go to File → Print
Under Page Sizing & Handling, select Actual Size or 100%
Set Print Quality to High (if available) and print
Paper Recommendation
Best for Vibrant Color: Smooth or semi-gloss cardstock (80–100 lb / 200–270 gsm)
For an Elegant Look: Lightly textured cardstock (like linen or subtle watercolor)
Avoid: Very rough paper or thin copy paper (ink can smudge or look dull)
Pro Tip: Print one test page first to see how the paper handles the ink before printing all your copies.
Printing at a Print Shop
You can also print at a local shop or use an online service if you don’t have a high-quality color printer at home.
Tip: Make sure to request printing at the original size (100%) so your designs don’t get resized.